Paint Bathroom Countertop White
If you are planning on making a few updates to your home you just might want to read this post first. Before you paint a countertop make sure you don't make these mistakes!
To help support our blogging activities, our site contains affiliate links. If you make a purchase from a link on our site, we may receive a small percentage of that sale, at no extra cost to you. Blessed Beyond Crazy is a participant in the Amazon Services LLC Associates Program, an affiliate advertising program designed to provide a means for sites to earn advertising fees by advertising and linking to amazon.com.
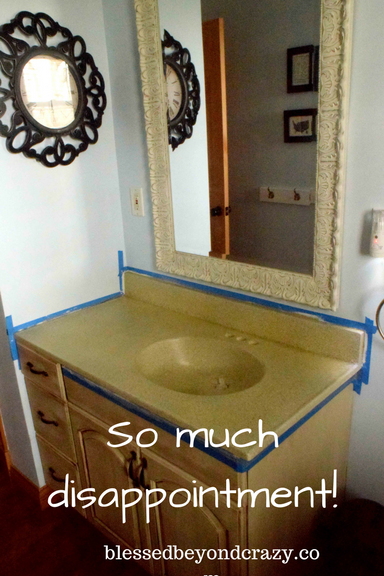
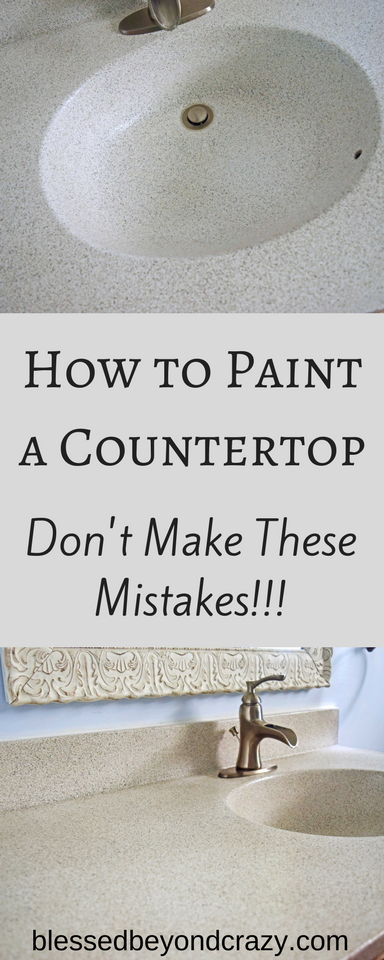
Once upon a time, we had an outdated bathroom vanity.
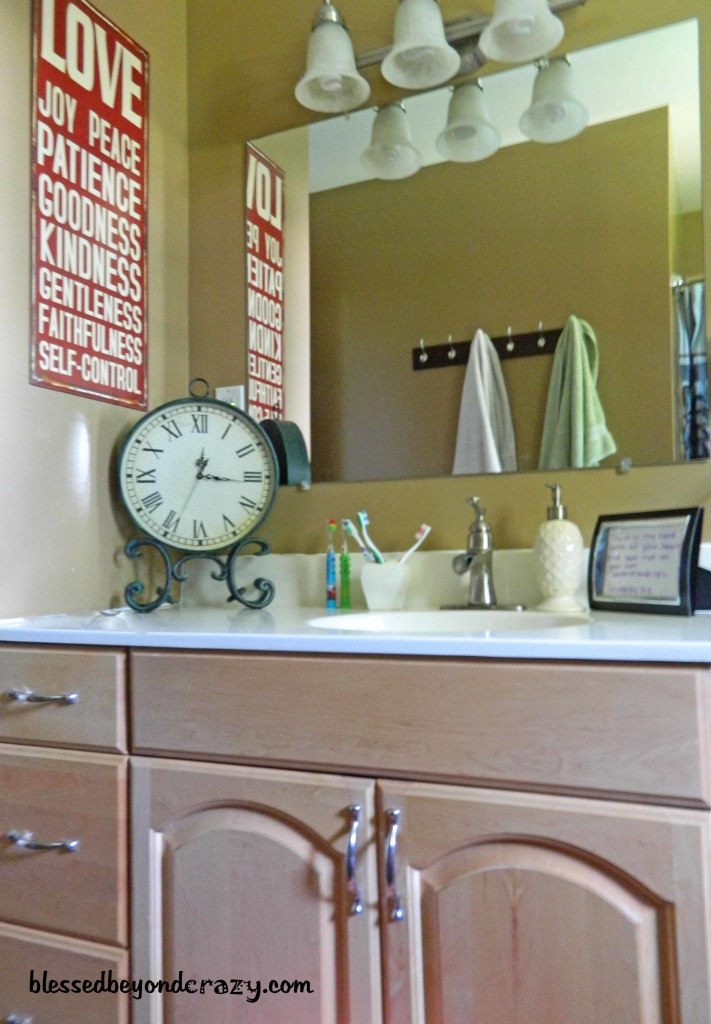
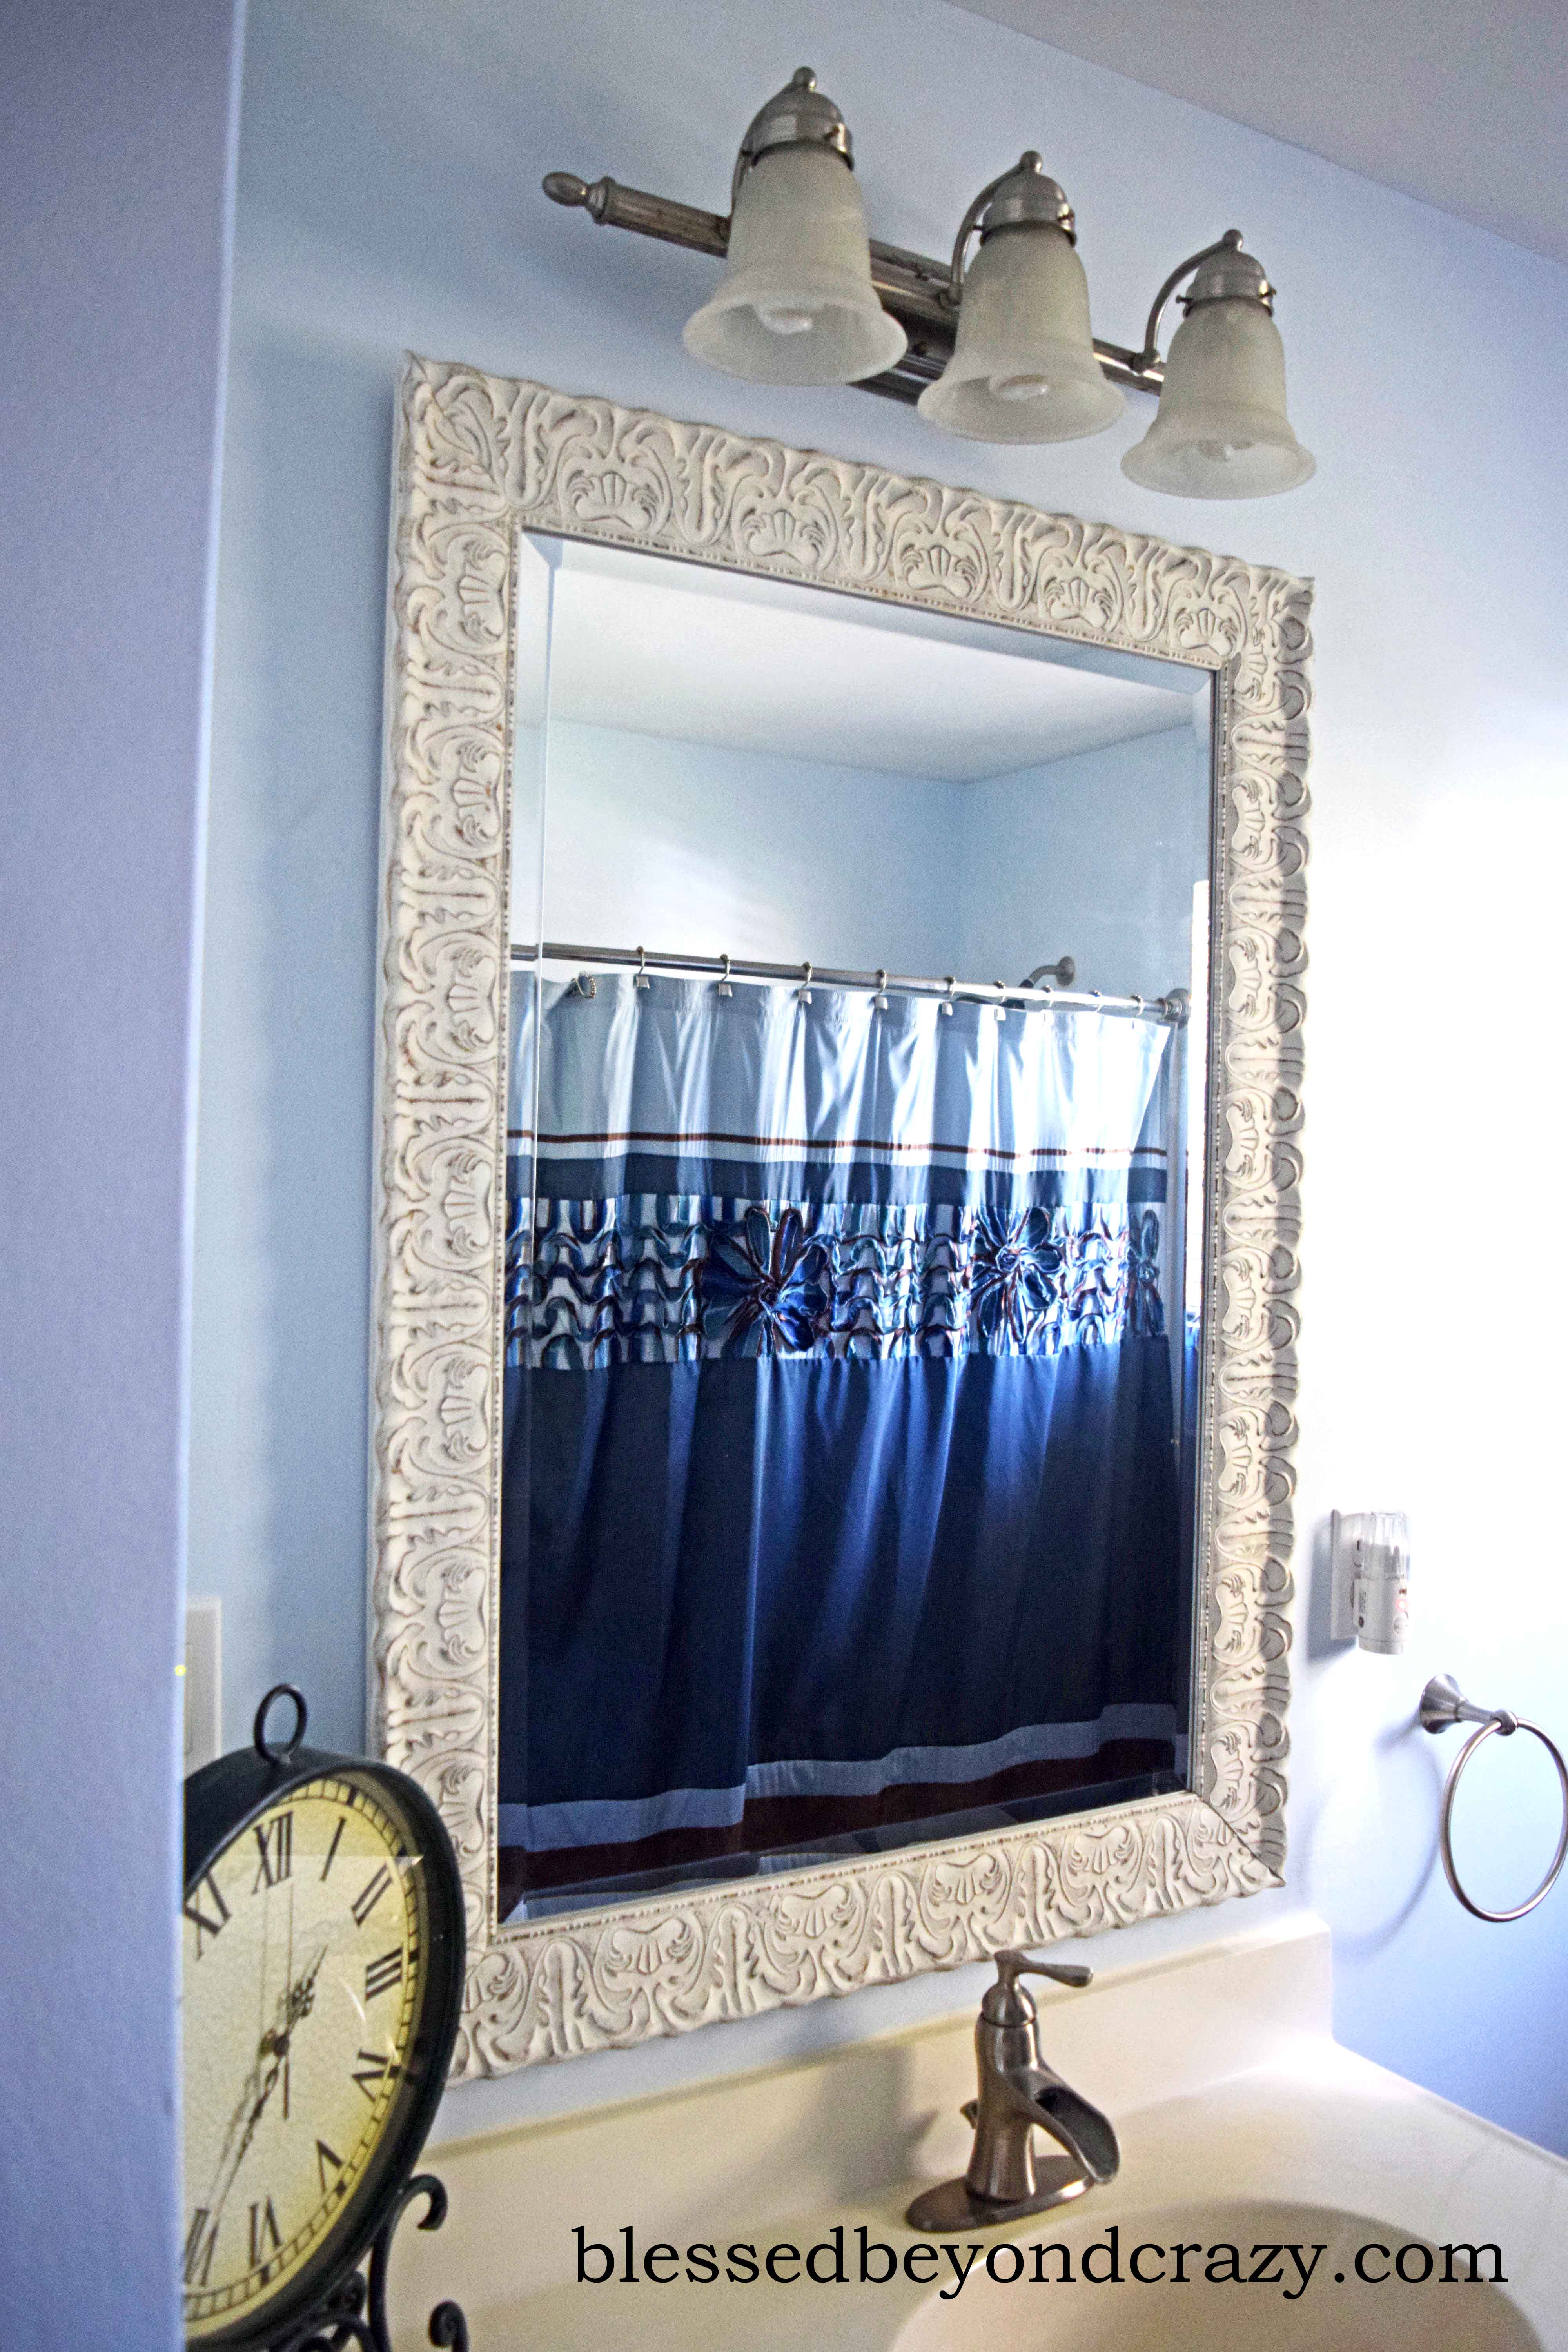
We painted our bathroom a light blue color and got a new mirror, which looks awesome! But now our vanity looked even more outdated! And clashed with the new paint color!
We decided painting would be the cheapest way to update our vanity. Only by saving us like literally $900!
Step 1: Research
I'm guessing that if you are thinking about painting your countertops, you are in this step right now. That is probably how you ended up reading this post.
I did lots of Pinterest research on how to paint a countertop. Every post I read did a great job of going into detail about how they painted their countertop, but none of them talked about running into problems. Everything for them went smoothly. No problemo!
Maybe I had false hopes on how easy this would be.
Please learn from my mistakes!
Step 2: Decide on a Method & Buy Supplies
You can brush/roll the paint, sponge paint, spray paint, or even buy marbling kits that will make your countertop look like it is a marble.
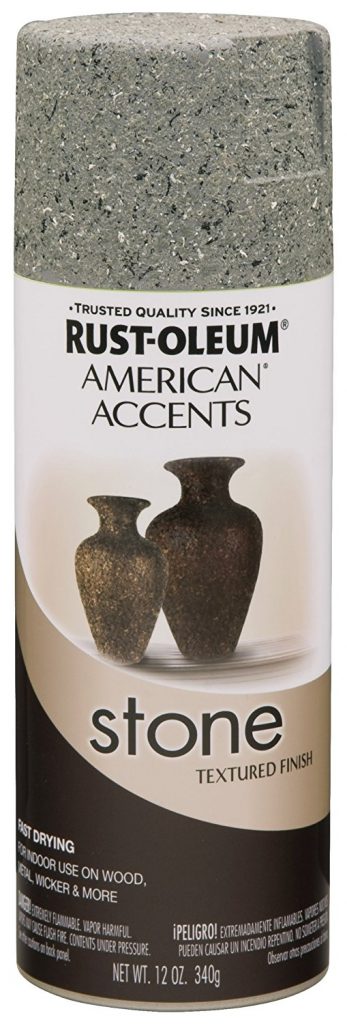
We went with spray paint because it looked like the easiest method. And I liked this look:
Step 3: Prep Countertop
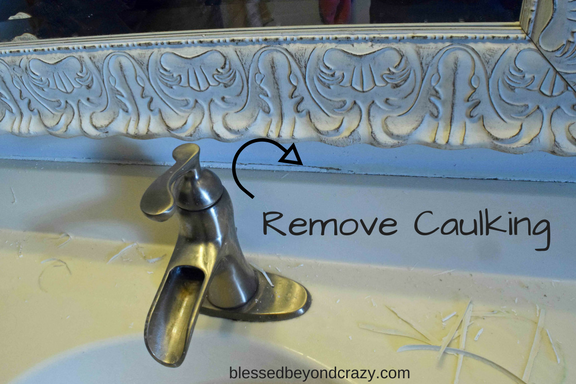
- Remove any caulking around the countertop. An Exacto knife and screwdriver work well for this. Be careful not to gouge the drywall.
- Remove faucet and drain.
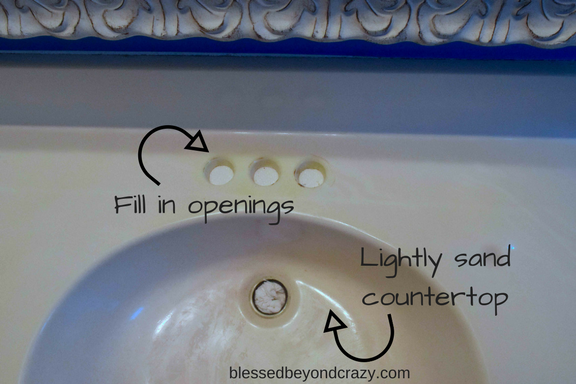
- Plug faucet holes with paper towels or something to prevent paint from going down those openings.
- Put a baggie over the drain pipe and secure it with a rubber band to prevent sewer gas from coming into your room.
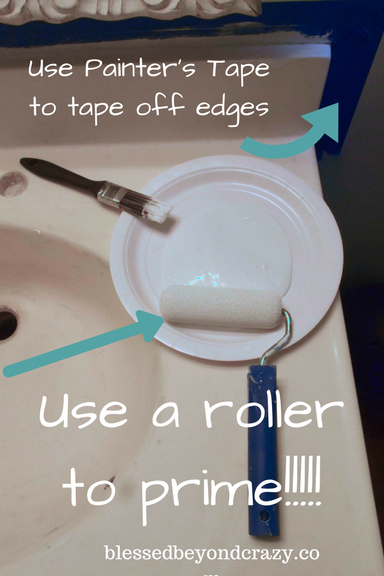
- Tape edges with painter's tape.
- Lightly sand the countertops. We first used 150 grit then went back over it with 220 grit.
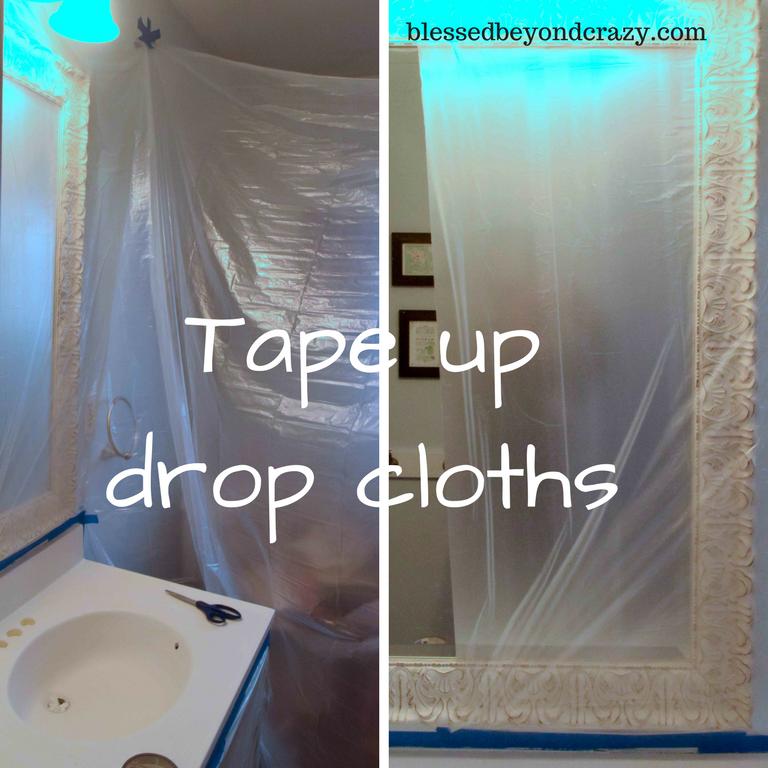
- Use painter's tape to tape up drop cloths around the room (only if you are using spray paint… to prevent the spray paint mist from covering areas you don't want to be painted).
- Wipe down the countertop with paint thinner to make sure they are completely clean before you start painting.
- Make sure you ventilate the area well! Open a window, place a box fan in the window pointing outside to suck the fumes out, wear a respirator, and turn on a vent fan if you have one!
Step 4: Prime Countertop
Since we were going to spray paint our countertops with this stone textured spray paint, we wondered if this step was necessary. Our countertop was already a light yellowish color, so we didn't need to lighten it, and we assumed that the spray paint would cover it completely.
We ended up priming it anyway since we already had a can of white paint… it couldn't hurt anything.
Well, this ended up being MISTAKE #1!
We brushed on white paint as a primer. We definitely needed to prime it because the stone textured spray paint we used was more of just colored specks and not a solid color. So priming was a good thing. The mistake was using a paintbrush! We could easily see the brush strokes through the paint!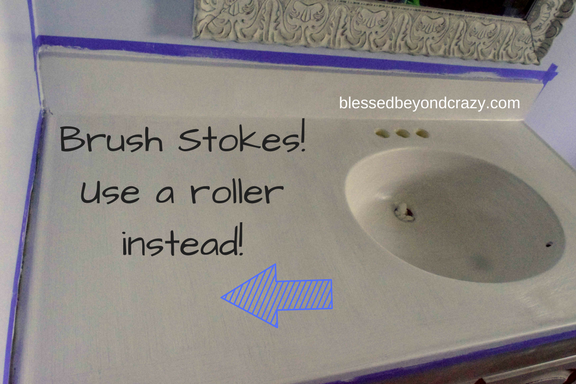
The brush gave great coverage and was easy to apply, but left some terrible-looking brush strokes. This was one of the mistakes we decided to fix the second time around by using a roller, and now there are no brush strokes!
Use a 4-inch foam roller and handle.
Step 5: Spray Paint
Once again, we got the opportunity to do this twice (the first time which had to be stripped off, and then the re-do). So here is how the second time was improved upon!
- Shake the can really well — since ours was speckled, we wanted the texture and colors to be even. And then continue to shake it often… like really often the whole time you are using it!
- Start painting from the back and work your way towards the front edge. If you painted from the front and worked your way back, the spray mist would cover the back before you got there, and it would have a heavier coating than the front (which is what we did the first time, and it was noticeable). Starting at the back and working your way toward the front will give your counter a more even coverage (which we did the second time, and it looked better).
- We gave our counter 2 coats, waiting 15 minutes between each coat. My husband has work lights that get really hot and put off a lot of heat. We set those up in the bathroom to help it dry faster.

At this point, I'm super excited! Our countertop looked amazing! I was so happy that it turned out and looked like a whole new countertop!
But my excitement didn't last long…
Step 6: Clear Coat
Then everything went down the drain…
My husband went to the hardware store and asked the man at the paint section what to put on top of this to seal it, explaining our project to him. He (poorly) advised that we put POLYURETHANE: Clear Satin on the top.
He was working at a paint counter at a hardware store… we assumed he knew best!
We brushed the first coat on. It looked yellow… but the can said CLEAR SATIN! It should dry clear, right? Not to mention, there were now a lot more visible paint strokes.
We applied 3 coats like what was suggested. And I was very sad.
The whole reason we wanted to paint our countertop was to get rid of the yellow color. Now our countertop was even more yellow! The texture was amazing, but the color was horrible!
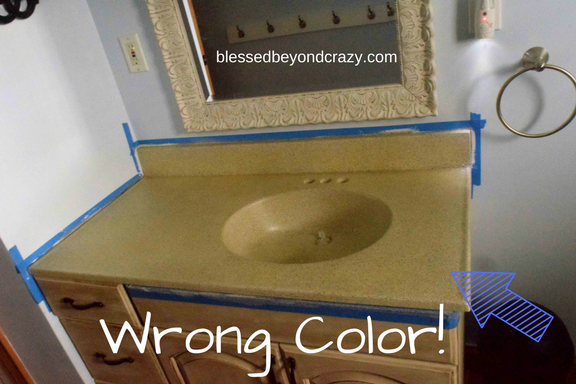
I very sadly told my husband that I did not like this, and he agreed.
Time to start over!
He stripped it down with Klean Strip, which is used to strip furniture. This chemical might not work on all surfaces, such as laminate so be careful if you decide to use it.
While this was disappointing, it was a very inexpensive mistake. It cost us less than $10 to fix, but it was a time-consuming mistake.
Repeat All the Steps 🙁
- Prep
- Prime (with a roller!)
- Wait 2 hours
- Spray paint 2 coats, 15 minutes between coats
- Wait 4 hours
- Clear Glaze, see below, 3 coats, 10 ish minutes between coats
- Wait 24 hours before reinstalling faucet or using counter
This time we used a spray-on Clear Glaze.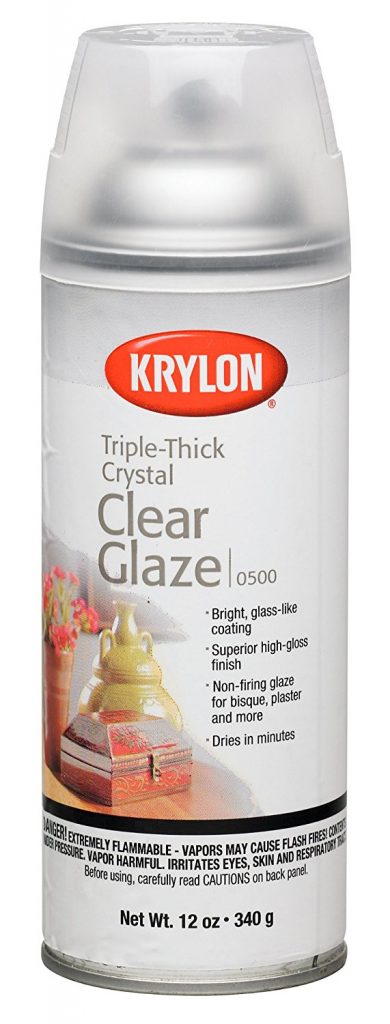
And this time it really was clear!

The spray paint we used does have a small bit of a rough texture to it.
I love how this speckled look helps to hide dirt and messes. There are also NO brush marks!
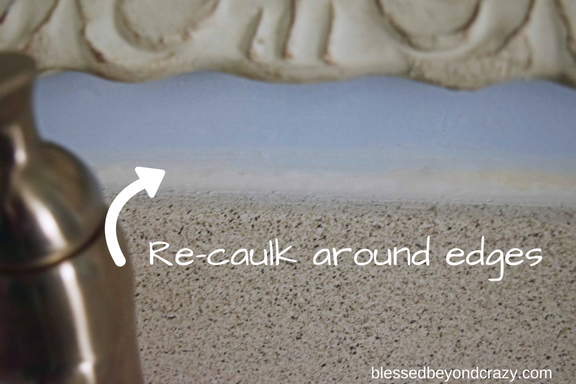
Step 7: Re-caulk
Wait 24 hours before doing anything with your countertop.
Now you need to re-caulk around the edges to prevent water from settling into the spaces between your counter and wall.
Use a Bath and Kitchen Waterproof Caulk to help it last much longer.
Tips for helping caulk look nice:
- Wear a latex glove
- Have a glass of water nearby
- Caulk the edges
- Dip a gloved finger in water and run it over the wet caulking — this helps give it a smooth finish
- Re-dip finger in water as needed to smooth out the caulk
Step 8: Reinstall Your Faucet
And enjoy your newly painted countertop!
Once more, here are all the steps in order:
- Prep
- Prime
- Wait 2 hours
- Spray paint 2 coats, 15 minutes between coats
- Wait 4 hours
- Clear Glaze, 3 coats, 10 ish minutes between coats
- Wait 24 hours before reinstalling the faucet and re-caulking, or using counter
Have you painted a countertop? How did it turn out?
Anna
Update:
If you have read the comments section of this post, then you will see that almost everyone wants to know how my counters have held up over time. Well here is the first update. It has been almost four months.
Sadly, my daughter spilled fingernail polish remover on one spot. After about a week or so, the textured part of the paint slowly started wearing off until it was just the white primer was showing in that spot. As we kept cleaning the counter, more of the paint was wearing off. We ended up trying lots of different methods on how to repaint just one small spot. What worked the best was spraying the spray paint heavily on a paper plate, then using a small paintbrush to carefully brush the speckles back on. We let it dry and added another layer of the clear coat.
Moral of this story: Be very careful with Acetone (fingernail polish remover) and what cleaners you use. A vinegar cleaner would probably be the safest bet!
P.S. I seem to have blogged a lot about this bathroom! Check out these posts:


Paint Bathroom Countertop White
Source: https://blessedbeyondcrazy.com/paint-a-countertop-dont-make-these-mistakes/


Tidak ada komentar:
Posting Komentar